Handling API Migrations Like a Pro
LaunchDarkly gives us lots of capabilities for ensuring migrations go quickly with less risk
As we saw with introducing our new webstore, release targeting can be a very powerful tool for testing in production. So why not just use release targeting for migrations as well? It's certainly a start, but we can do more!
✅ Immediate Resolution with Flag Triggers
Unfortunately, issues with technology migrations don't always play nice with work schedules. Usually they wait until the wee hours of the morning or the weekend to have a hiccup and the unfortunate SRE on call has to scramble to take care of the fallout. Does it have to be? As you might have suspected, the answer is, "No, you don't need to wake someone up at 2:00am on a Saturday to take care of a broken API!" 😅
LaunchDarkly provides a feature called Flag Triggers. These allow us to automate the process of disabling flags in the event of an error.
Step 1: First, go to the billing flag and select the Settings tab. Here you will see an option to + Add trigger and choose the Generic Trigger. It will look something like this:
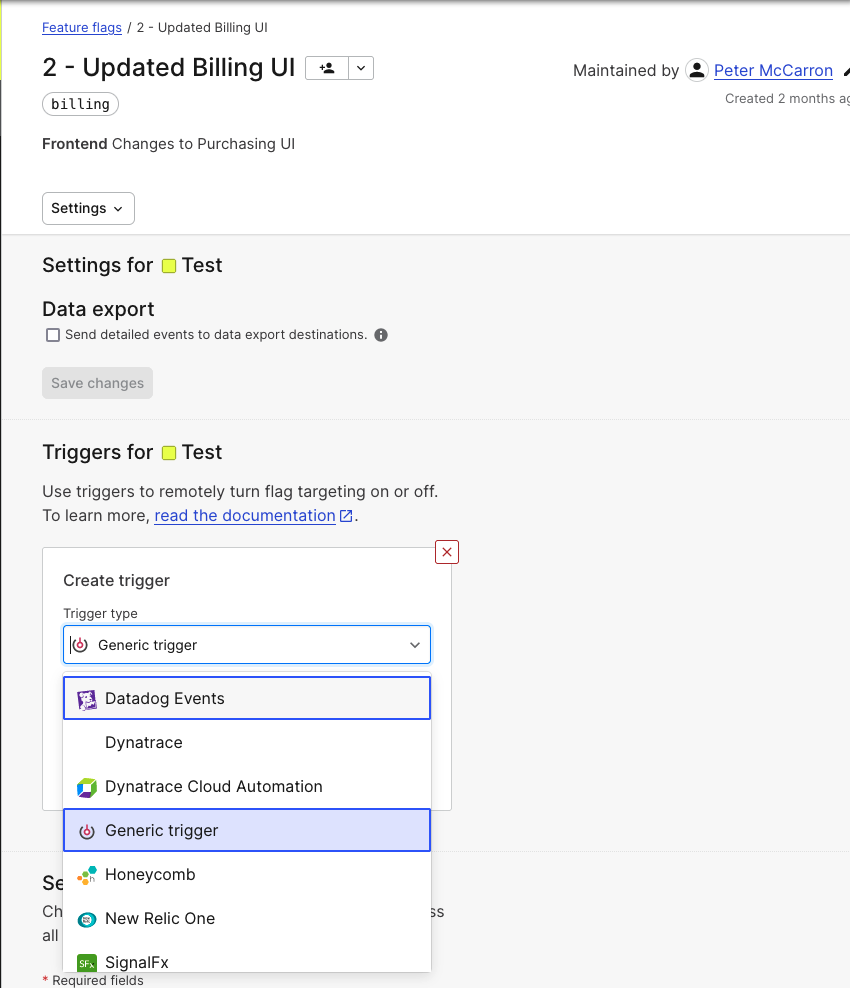
Step 2: Create a Generic trigger, copy the new Flag Trigger URL that was created and save it in a note, we will need that in a moment.
What other Flag Triggers can I create? Flag Triggers can be integrated into popular APM solutions like Datadog, Honeycomb, SignalFX, New Relic, and more! When using these integration, custom events sent from the APM can trigger the changing of a flag.
Step 3: Copy the code block below, and use it to replace the existing code in the useErrorHandling.ts file located in the /src/hooks directory.
// hooks/useErrorHandling.ts
import { useState } from 'react';
import { useShoppingCart } from 'use-shopping-cart';

const useErrorHandling = () => {
  const [errorState, setErrorState] = useState(false);

  const { clearCart } = useShoppingCart();

  const Trigger = async () => {
    try {
      const response = await fetch(
        // put your flag trigger URL in here using this format: 'http://your-flag-trigger.com', (needs both the comma and quotes)
        {
          method: "POST",
          body: JSON.stringify({
            eventName: "There was an error with the API",
          }),
        }
      );
      return response.status;
    } catch (error) {
      console.log("the fetch did not work");
    }
  };

  const errorTesting = async () => {
    try {
      const response = await fetch("/api/checkout", {
        method: "GET",
        headers: { "Content-Type": "application/json" },
      });
      const jsonData = await response.json();
      if (jsonData == "the API is unreachable") {
        setErrorState(true);
         clearCart()
         Trigger()
        return 502;
      } else {
        setErrorState(false);
      }
    } catch (e) {
      console.log("is it running?");
      console.log(e)
    }
  };

  return { errorState, setErrorState, errorTesting };
};

export default useErrorHandling;
Step 4: In the Trigger function of the code you just copied, update the fetch to call your Flag Trigger URL.
Step 5: Turn off the enableStripe flag and then try adding something to the cart. You'll see the error message pop up, but this time when you close it, it will have automatically reverted to the self-hosted form and your flag will be disabled in LaunchDarkly.
Important Note
If you implement this code without a flag trigger URL, the application will crash. Adding a flag trigger is not a necessary step to continuing through this workshop, so if you are having trouble, skip this step!
While flag triggers are good in case something goes wrong, if we know that two flags are reliant on one another, like these two flags are. We have another way of ensuring that one can't be turned on without the other.
Turn Your Flags Back On!
If you ran through the flag trigger demo, make sure you turn both flags back on before proceeding, otherwise, it's going to cause things to break!
👯♀️ Introducing Prerequisite Flags
Before we get started, let's recap what exactly happened with our failed migration earlier. We have two components:
billingflag: controls the frontend UI componentsenableStripeflag: controls the API connection with Stripe
The frontend changes (made available by the billing flag) don't work properly if the backend capabilities aren't enabled (the enableStripe flag). In order to prevent this misconfiguration from creating errors for customers in the future we are going to create a Prerequisite Flag.
Step 1: Navigate back to your LaunchDarkly dashboard and open the settings for the billing flag. At the top of the page, you'll see an option to Add prerequisite:
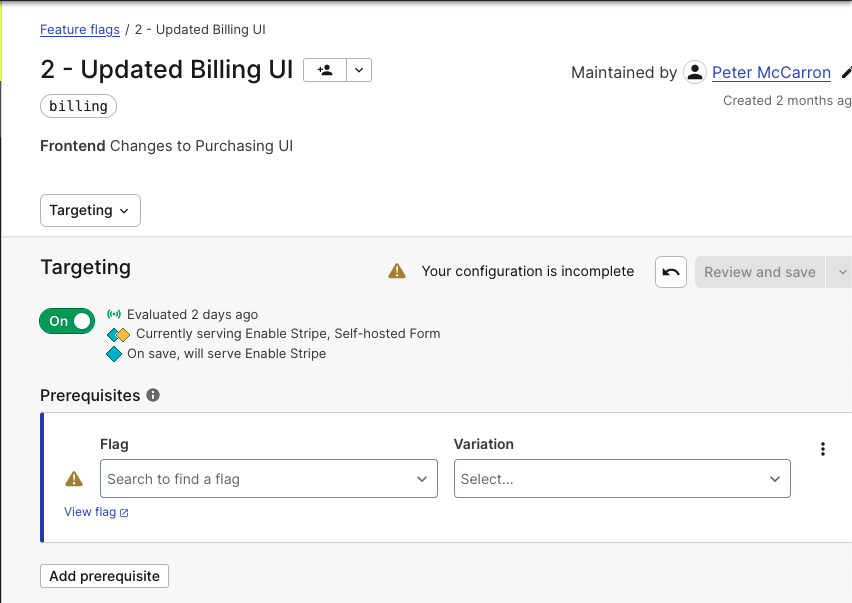
Step 2: Creat a prequisite rule that says the enableStripe flag must be serving Stripe Checkout Enabled.
Why do we need a prerequisite flag?
These two components are reliant on one another in order to operate correctly, but they're managed by two different teams: Web developers and API team. While we like to think that communication is never an issue, miscommunications happen and teams forget to inform one another when they are pushing changes or doing maintenance.
Step 3: Save and review the changes and you'll see that the cart functionality still works. Try switching off the enableStripe flag and check your application, you'll notice we're back to the self hosted form!
Using this, it means we only have to turn off the enableStripe flag if there's an issue or maintenance is being done and it will disable the frontend features automatically!
🚙 Progressive Rollouts
We've covered how to prevent fallout when things go wrong, but sometimes things go wrong not because of faulty code, but because of strain from live traffic in the new environment. Brittle APIs can be very troublesome and it's difficult to load test in our development environments. Fortunately with LaunchDarkly we don't have to take an all over nothing approach to migrations. We can incrementally rollout changes and measure the results as we move through the migration process. One of the core features for doing this in LaunchDarkly is through a feature called workflows.
Each stage of a workflow can advance automatically (time-based) or wait for approvals (which can also be automated through REST API calls), we won't actually implement one in our application. In the flag screen, there is a tab for Workflows. When you select that tab, you will see this screen:
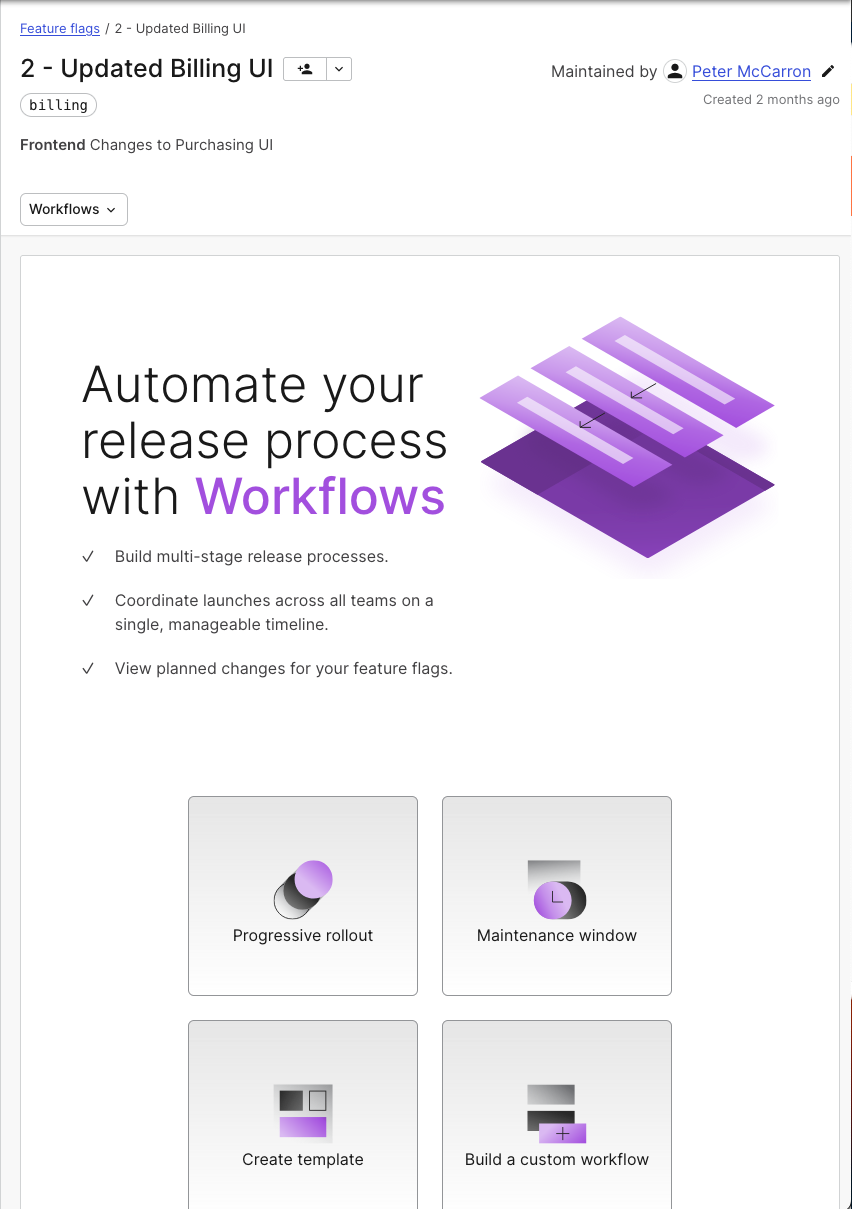
LaunchDarkly supports three types of workflows:
- Progressive rollouts: Incrementally rollout a new release by a certain percentage on a daily basis. A great option when testing APIs against increasing traffic!
- Maintenance window: Sometimes we have a defined period of time when a feature needs to be disabled. Set up a workflow to ensure the right flag values are served during that window!
- Custom workflows: Targeting certain groups, gaining approvals, sometimes migrations are more complex and span multiple teams/groups. We can create customized templates for these scenarios and re-use them in the future.
Feel free to play around with the workflows screen, and when you're ready we can shift gears to another type of migration: Database migrations!
Troubleshooting Tips
If you're having trouble with any of these steps:
- If you are unable to get the flag trigger to work, make sure you have the correct URL in your code.
- Make sure you replace lines 9-40 with the new flag trigger code
- If it seems like your prerequisite flag isn't working, double check the default variation in your flag